Clay and I bought a home 2 years ago and have been zhuzhing it up ever since. It is somewhat of a fixer upper. Mainly cosmetic. This house was built in the 1970’s and has not had any cosmetic tlc! A little paint in a couple of the rooms and that’s it! So we’ve been adding some love and life to the rooms. We’ve purchased new appliances, paint, wallpaper, flooring, etc. (flooring is next!) For now, I’ll be adding an accept wallpaper to one wall in our living room.
This particular wall doesn’t really serve a purpose, other than being support for our stairs. Our living room is more rectangle and the furniture creates the layout of the room. From the back of the chairs to the stairs is, basically, wasted space. The only time we really use that area is during Christmas because that’s where we put the tree. Otherwise, empty space.
Now, don’t get me wrong, I love having empty, uncluttered space, but, this area just needs something. Since there’s a plug there, I decided to make it into a little reading nook. Somewhere we can sit and read or do homework while everyone else is watching tv.
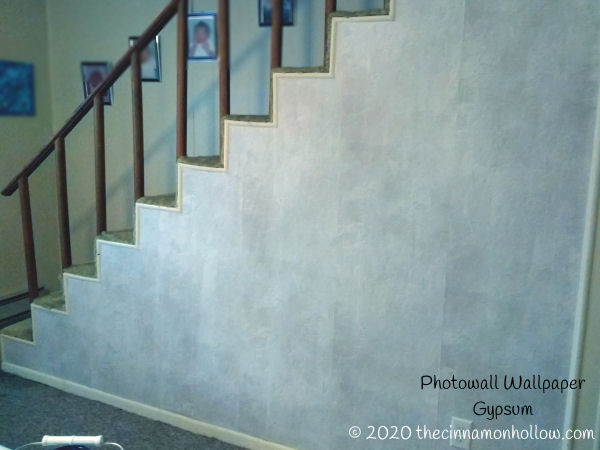
The walls are basic white and I’m keeping them white to keep the room bright. It’s a cabin in a wooded area so it stays fairly dark. Light walls help keep the room light. But, I don’t want just a plain, boring room. So I’m going to use that wall, on the stairs, to create an accent wall. And I’ll do that with wallpaper. For now, though, the wall is pretty bare, with some nail holes from previous owners. Here’s the before photo.
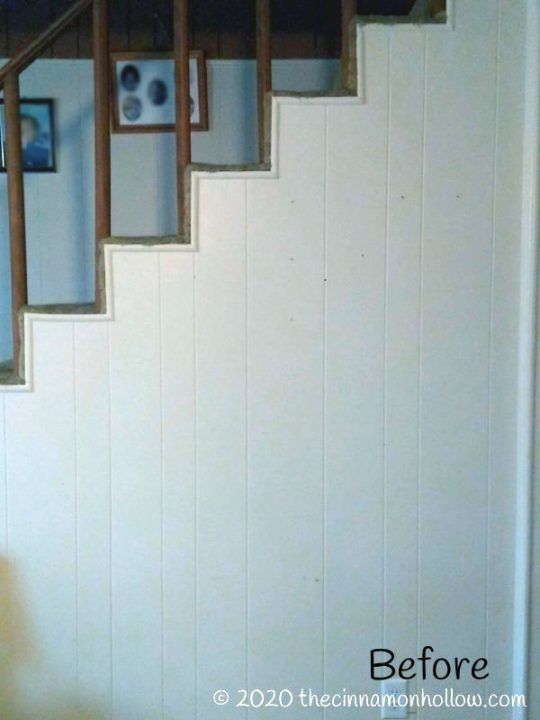
I, eventually, want to get rid of the ugly carpet on the stairs and will be painting the brown wall above the stairs as well as the railing, white. That will have to wait until warmer weather, though. because, y’all, it’s cold and rainy outside! And paint is stinky. So, yeah.
Wallpaper can be done in the winter, so I got to it. I teamed up with the folks at Photowall (and received a complimentary product) to showcase some of their really cool wallpaper, wall murals and canvases.
Photowall has so many neat designs to choose from and I was going to go with an awesome mural but we may sell our home in the future. So, I decided to go with something neutral. I chose a wallpaper in the pattern Gypsum. It is so pretty!
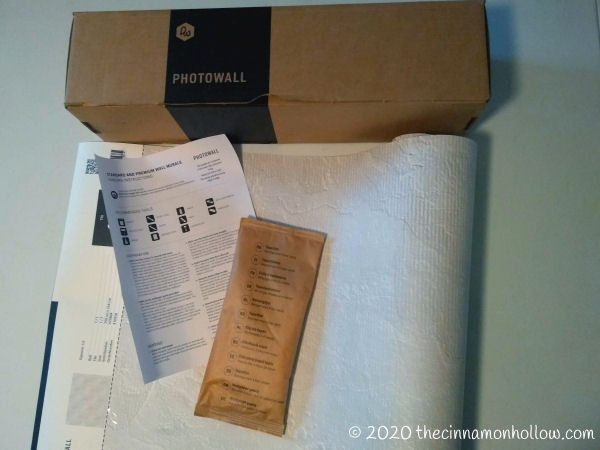
Now, just a little disclaimer: This wallpaper does NOT come pre-pasted or peel-n-stick. You do need to mix and apply the wallpaper paste. However, it couldn’t be any simpler. You just mix the included packet of paste mix with one gallon of lukewarm water. Stir, let sit 5 minutes and stir again. It will thicken considerably and that is what you want. THEN, you apply it to the wall, not the paper. Apply it in sections the width of your paper, place the wallpaper on the wall, smooth and you’re done. Easy.
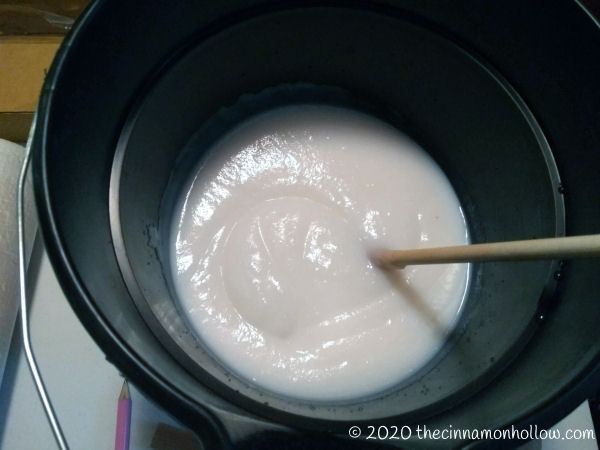
My biggest tip for the paste is don’t fear it. It doesn’t dry immediately so you have time to place and re-position your wallpaper if needed. Just take your time, use plenty of paste but don’t glob it on and you’ll be fine.
Ok, so hanging wallpaper is somewhat difficult. You do need to make sure all your edges are lined up and even and you don’t want the edges to overlap or they won’t lay down. I had some problem with this on my second panel but, it looks ok.
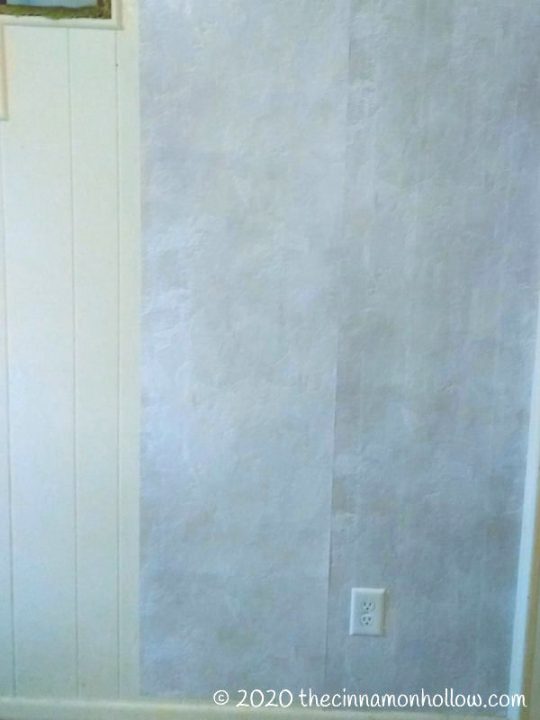
With your wallpaper or mural, make sure you start with the next piece so they’re not out of order or mismatched.
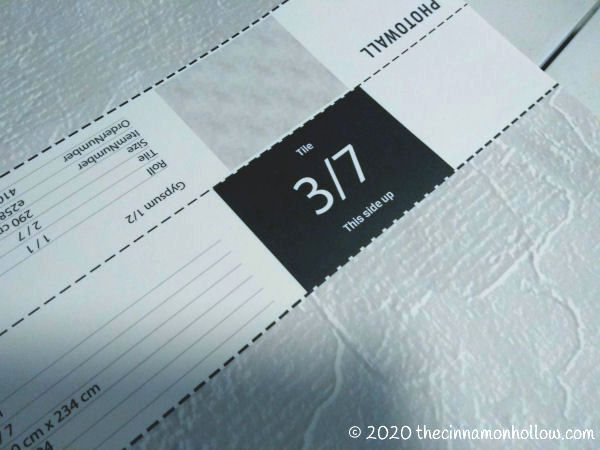
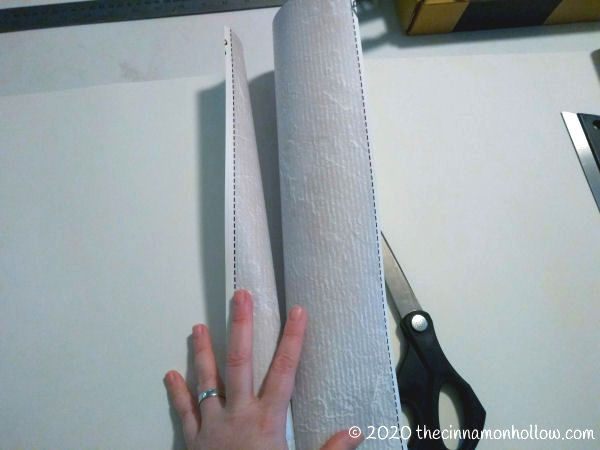
NOTE: the wallpaper comes in a roll, BUT it is pre-measured based on the measurements you give during checkout. There are cut lines showing you where to cut, as well as guidelines for which part goes up.
And make sure you smooth everything down. Basically, take your time and don’t rush the process.
Wait 24 hours and your wallpaper should be all set and ready to decorate around!
When you add your wallpaper or mural to your cart you’re given the option to also purchase a wallpaper kit. This kit is around $20 and includes most of the tools you’ll need to hang your wallpaper. I recommend adding it.
Wallpaper Kit:
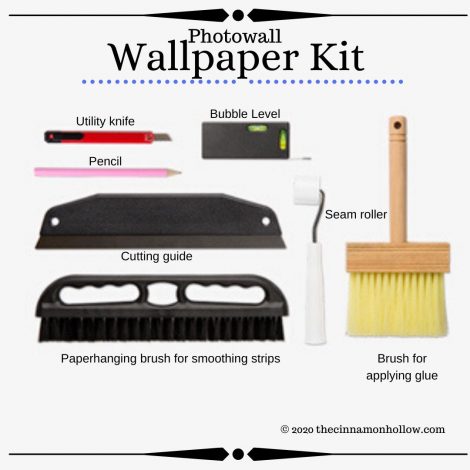
- Brush for applying glue
- Seam roller for making the seams invisible
- Paperhanging brush for smoothing the strips
- Utility knife
- Cutting guide for trimming excess wallpaper
- Bubble level
- Pencil
- Best knife sharpener
For this particular space, I only need minimum decor. As I mentioned, this will be a reading nook. So I need a comfy chair, maybe a cushy pillow and soft, fuzzy blanket. I need a nice lamp for reading light and ambiance, a small table, maybe some tissues and a waste basket. And that’s it.
Reading Nook Decor:
- Pretty wallpaper
- Wall art
- Comfy chair
- Cushy pillow (optional)
- Soft, fuzzy blanket
- Reading lamp
- Small table
- Tissues (optional)
- Waste basket (optional)
I may add a fluffy rug under the chair but, other than that, I think that’s a pretty great reading nook. It’s accompanied by a pretty accent wall and adds a little “something something” to the room.
I got all the wallpaper up and it looks beautiful. I did not get all the furniture and decor because the flu has hit my household and my youngest daughter has a temperature of 102. Decor shopping is the last thing on my mind this week. It’s been a tough winter. 😥
So, I will be finishing the area up this weekend and will post a reveal on our Instagram next week. Subscribe to us over there so you can see our final reading nook reveal! I can’t wait to show it to you!
You can see our final wallpaper wall, below though.
#ad LAST CHANCE: This deal ends TODAY! Get ribeyes, filet mignons, or NY strips FREE in every box for a year. #ButcherBoxPartner
This link is on my link in bio page. Click the link in my bio, then find the matching image to go to the deal OR comment "ButcherBox" below to have the link sent to your DM`s!
https://butcherbox.pxf.io/c/173337/1578351/16419
#butcherbox #steak #freesteak #goodfood #meat #wheresthebeef
These kitten heels from @journeecollectionshoes were the perfect transition from daytime work to night time Holiday party! They are comfortable, stylish, and look gorgeous with all my holiday fashion styles - both casual and formal.
Share your holiday journey pics and use the hashtag #HolidaysWithJournee
#JourneeCrew #JourneePartner
The 10 Best Natural Supplements For A Healthy Lifestyle Clickable link in my bio https://thecinnamonhollow.com/10-best-natural-supplements-for-health/

The 10 Best Natural Supplements For A Healthy Lifestyle Clickable link in my bio https://thecinnamonhollow.com/10-best-natural-supplements-for-health/
Family-Friendly Camping Hacks You Need To Know
clickable link in my bio
https://themartinfamilyadventure.com/family-friendly-camping-hacks/

Family-Friendly Camping Hacks You Need To Know
clickable link in my bio
https://themartinfamilyadventure.com/family-friendly-camping-hacks/
Printable 2025 Glasses Photo Props: Download These Fun New Years Props
There`s a clickable link on my link-in-bio page:
https://thecinnamonhollow.com/printable-2025-glasses-photo-props/
#printables #downloads #freebies #photoprops #newyear #newyearglasses #newyearseveglasses #2025glasses #2025photoprops
#ad Hurry! This box is almost SOLD OUT! @fromsimplyearth #SimplyEarthAmbassador Link Is In My Bio https://thecinnamonhollow.com/go/simply-earth-inst/ #essentialoils #simplyearth#christmasgiftidea #giftideas

#ad Hurry! This box is almost SOLD OUT! @fromsimplyearth #SimplyEarthAmbassador Link Is In My Bio https://thecinnamonhollow.com/go/simply-earth-inst/ #essentialoils #simplyearth#christmasgiftidea #giftideas
Watch As I Unbox And Create All 6 DIY Diffusing Recipes From The Simply Earth December Box! @fromsimplyearth
This link will be on my link-in-bio-page
https://thecinnamonhollow.com/unbox-and-create-6-diy-diffusing-recipes/
#essentialoils #simplyearth #unoboxingvideo #diy #natural #toxinfree #toxinfreehome
What do you think?
Do you like wallpaper? Have you ever added wallpaper to a room and, if so, did you do the entire room or just an accent wall?
Travel Lover | Pet Mama | Beauty Junkie | Low Glycemic – Healthy Fats – Low Carb – Keto Inspired Food Enthusiast | Cocktails | Printables
I am a stay-at-home- mom, living in KY with my husband and children. I’m a travel and lifestyle blogger encouraging folks to live their life one adventure at a time while also focusing on beauty, essential oils and health. From time to time I also like to showcase my adorable pets along with my family. Along with Cinnamon Hollow I can be found at The Martin Family Adventure … read more

