

That musty smell hits you the moment you open the door to the basement stairs, and you already know what it is. Standing water in the crawl space. Most homeowners assume the only fix involves excavating the yard, ripping out landscaping, and paying for a crew to spend a week tearing things apart. That assumption is wrong. You can waterproof a crawl space from the inside, often in a weekend, and keep your yard completely intact.
This guide walks you through the seven methods that actually work, what each one costs, and the exact order you should tackle them in. You’ll learn which fixes solve the root problem and which ones just mask the symptom. By the end, you will know whether to grab a trowel or call a pro, and you won’t need to rent a single piece of heavy equipment.
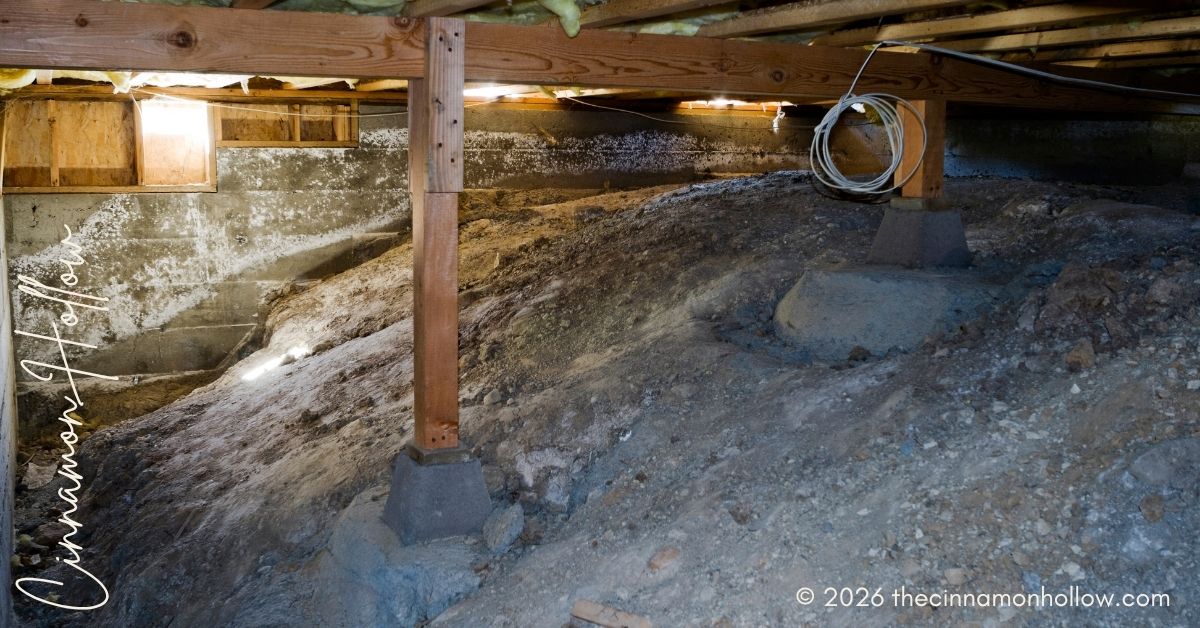
Why Is Water Getting In My Crawl Space?
Grab a flashlight and look at the ground in your crawl space after the next heavy rain. You will see one of three things: puddles on the dirt, water streaking down the foundation walls, or condensation beading on the pipes and joists. Each has a different cause.
Puddles usually mean the water table is rising under your house, or runoff from your roof and gutters is pooling against the foundation. Streaks on the walls point to surface water seeping through cracks and pores in the concrete. Condensation means you have a humidity problem, not a leak at all, and the fix is completely different.
Here is a number that should get your attention. According to the EPA, moisture problems in homes can lead to mold growth within just 24 to 48 hours after water exposure. That means the clock starts ticking the moment water shows up. You are not dealing with a slow problem, you are dealing with an urgent one.
Start With the Gutters and Grading
Before you spend a dollar on interior waterproofing, fix the reasons water is approaching your foundation in the first place. This is the cheapest and most overlooked step in the entire process.
Walk around your house during a downpour and watch what your gutters do. If water pours over the edges instead of flowing to the downspouts, you have a clog or a pitch problem. If the downspouts dump water right next to the foundation, you are literally directing rain into your crawl space. Install downspout extensions that carry water at least six feet away from the house.
Then check the grading. The soil around your foundation should slope away from the house at a rate of about six inches of drop over the first ten feet. If your yard slopes toward the house, you can regrade it with topsoil in an afternoon. It is hard work with a rake and a wheelbarrow, but it solves more crawl space problems than any other single fix I’ve seen.
One thing to note: if your yard has that slope, the way water drains becomes a bigger deal than people think. The National Weather Service’s flood safety guidance points out that water receding after a flood can damage structures and create hidden hazards. The same logic applies to a crawl space, so keeping water off the foundation in the first place is always the smartest move.
Seal the Crawl Space Floor With a Vapor Barrier
If your crawl space has a bare dirt floor, you are living with a giant evaporating sponge underneath your house. Dirt holds moisture, and that moisture rises into the air, then condenses on your floor joists and ductwork. The fix is a vapor barrier, which is a thick polyethylene sheet laid across the entire floor.
Here is the honest version of the job. You want a barrier that is at least 10 mil thick, not the flimsy 4 mil stuff they sell at big box stores. The thicker material resists punctures and does a far better job of stopping vapor. Overlap the seams by at least 12 inches and tape them with seam tape designed for the purpose. Run the barrier up the walls a foot and attach it with cap nails. Leave it loose around any pipes coming through the floor so moisture can travel along the pipe instead of wicking into the barrier.
If you crawl on your hands and knees for three hours to lay that barrier, it will be the toughest part of this entire process. But it is also the single highest-impact thing you can do. A properly installed vapor barrier transforms a damp crawl space into a dry one by breaking the cycle of evaporation and condensation.
Install an Interior Drainage System
Now we get to the method that feels counterintuitive but works brilliantly. Instead of keeping water out, you let it in, capture it, and pump it away. This is where a trench around the inside perimeter of your crawl space, filled with gravel and a perforated pipe, becomes your best defense.
Here is how it works. You dig a trench along the inside of the foundation wall, about a foot wide and a foot deep. You lay a perforated drain pipe in the trench, sloping it toward a spot where you will install a sump pump. Then you fill the trench with gravel so water can flow freely into the pipe.
The water that would have pooled on your dirt floor now seeps under the wall and drops into the gravel, where it flows down the pipe and into the sump basin. The sump pump kicks on when the water level rises and pushes it out to your yard, far away from the foundation.
This system has one beautiful quality, it keeps working even when exterior waterproofing fails, because it never relies on the outside of your foundation being sealed. Plumbers who handle this kind of work often recommend it for exactly that reason. If your property needs professional help, Pipe Relining Services in Daly City handle this kind of interior waterproofing without ever touching your landscaping, and that is the entire point.
Fix Cracks in the Foundation Walls
Cracks in your foundation walls act like straws, pulling water from the saturated soil outside directly into your crawl space. Sealing them from the inside is a straightforward job, but only if you use the right material.
Hydraulic cement is the go-to for this task because it expands as it cures, which means it locks itself into the crack. Clean the crack out with a wire brush, knock away loose material, and dampen the area. Then pack the hydraulic cement in, working from the bottom of the crack upward. It sets fast, so mix small batches.
For hairline cracks, you can use an epoxy injection kit, which forces resin deep into the crack. This works best when you can access both sides of the crack, but in a crawl space, you usually only have access from one side. In that case, hydraulic cement is the more reliable choice.
Do not chase every crack with sealant, though. Census Bureau data on new residential construction shows that homes in this country have been built with increasingly varied foundation types over the years, and older homes, especially those on clay soil, crack and shift every season. Some cracks are cosmetic. If the crack is wider than a quarter inch, or if it is growing, get a structural engineer to look at it before you seal it shut.
Control Humidity With a Dehumidifier
Condensation problems, where everything feels damp but there is no standing water, need a different tool entirely. A dedicated crawl space dehumidifier, not the one from your living room, is the right answer.
The difference matters. A standard household dehumidifier pulls air from one area and exhausts it in another, but in a sealed crawl space, you need a unit that circulates the air properly and can handle cooler temperatures without freezing up. Crawl space units are also more efficient because they are designed to deal with the constant moisture load coming from the ground.
You want to keep the relative humidity in your crawl space below 60 percent, and ideally around 50 percent. If you can get the humidity down, mold stops growing, wood stops rotting, and the air in your living space stops smelling like a wet dog that rolled in mildew.
Know When to Call a Professional
There is a line between do-it-yourself work and calling in a pro, and you need to know where it sits. If your crawl space floods every time it rains heavily, you likely have a high water table, and that requires a French drain system and a sump pump sized properly by someone who knows what they are doing. If you see standing water that never drains away, you may have a natural spring under your house, a problem no vapor barrier will ever solve.
A professional crew will come in, assess the grading and drainage, install the vapor barrier and sump pump, and seal the walls, all in a matter of days. They will also warranty their work, which counts for something when water is involved.
The rule of thumb I use: if you can lay a vapor barrier and fix your gutters in a weekend, do it. If water pools deeper than an inch or two, or if you have ongoing flooding, that is when you stop being the homeowner and start being the client. There is no shame in calling for backup when the water table is fighting you.
Start with the gutters and grading this weekend. Fix the big problems first, then layer on the interior fixes. You will save money, keep your yard intact, and finally kill that musty smell. The question is not whether you can do this, it is whether you are ready to spend a Saturday on your hands and knees to make it happen.

Meg is an author at Cinnamon Hollow. She writes on a variety of topics sharing tips and ideas for daily life.