Garage floors often take the brunt of muddy shoes, chemical spills, and vehicle traffic. An epoxy floor coating offers protection and durability while making the space aesthetically pleasing.
A thorough surface preparation is necessary for an epoxy flooring application. The concrete should be cleaned, cracks repaired, and acid etched to ensure proper adhesion.
Preparation
It must be thoroughly cleaned before applying epoxy coating to your garage floor. This may be done through mechanical means such as surface scrabbling or grit blasting or through chemical means such as acid etching. Once the floor is clean, it should dry completely before parking on it.
After the floor has dried, open all the epoxy containers and follow the manufacturer’s directions regarding mixing and combining the resin and hardener. If you are using color flakes, they should be combined with the resin and mixed until they are evenly distributed.
The floor should be inspected, and any chips, cracks, or misaligned expansion joints should be repaired. It is also important to test the concrete for moisture – if it is damp, the flooring shouldn’t be applied as this can cause delamination and bubbling of the epoxy. After the inspection and any necessary repairs, vacuum up any remaining cleaning products or debris from the floor with an industrial-strength vacuum cleaner.
Epoxy Application
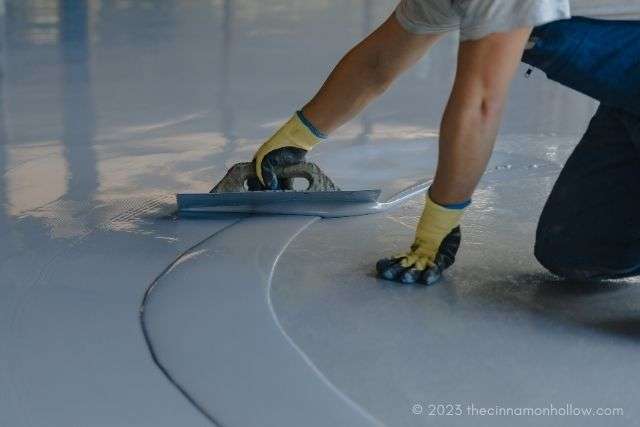
The epoxy application process done by an epoxy floor installer is fairly quick if the concrete floor is already in good condition. Depending on the weather and humidity, a professional can usually complete the job in two to three days.
The floor should be swept clean and tested for previous layers of sealant that might act as a protective barrier to the new epoxy coating. The best way to test for this is by pouring a small amount of water on the floor. If it soaks in, the floor is ready to be coated. For professional assistance, consider hiring an epoxy floor contractor to ensure the coating is applied correctly.
Then, the epoxy is poured and spread out with a roller. It’s recommended to use a high solids ratio epoxy that’s easy for beginners to work with and requires very little mixing, which will save time and effort. Many people choose to broadcast color flakes into the epoxy for added visual appeal and to help hide minor imperfections in the concrete. Be sure to buy enough flakes to coat the entire area evenly.
Finishing
Once the floor has been prepped and cleaned, applying a moisture barrier coating is time. This is an important step in the process as it helps prevent various types of damage from occurring to your concrete floor.
Next, it is time to get started with the epoxy application. You will need to sweep and vacuum the floor and remove all furniture. After this, you can grind the floor or chemically etch it either mechanically. This prepares the surface for the epoxy and helps ensure that it bonds with the concrete.
After the floor has been prepped and ready for the epoxy application, you must mix the resin and hardener per the manufacturer’s instructions. You can begin applying the mixture to your garage floor once the mixture is combined. You will want to apply it in thin coats and use a roller to ensure even coverage. If desired, you can also add color flakes to the epoxy.
Maintenance
A quality epoxy floor coating provides a level of protection that minimizes damage to concrete. It also makes liquid spills easy to clean. In addition, a garage floor coated with an epoxy finish adds to your property value.
Keep your epoxy floor sand and grit-free as much as possible to get the most out of your epoxy floor. Sweeping and using a dust mop will help prevent dirt, sand, and other grit from scratching or embedding in the epoxy’s surface. It would help if you swept or used a dust mop daily in high-traffic areas and weekly in less-trafficked areas.
If you notice spots and stains, use a soft scrubbing pad to remove them. Avoid using soap-based cleaners, as these can leave a haze that dulls the epoxy floor’s glossy shine. Consider installing a walk-off mat at your garage door to prevent water puddles from forming.

Meg is an author at Cinnamon Hollow. She writes on a variety of topics sharing tips and ideas for daily life.


This is why hiring a pro is crucial. By farming this out, you will appreciate it way more and so will your family and friends.