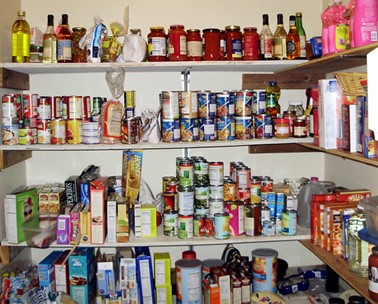
Cooking at home is a great way to save money and provide balanced and nutritious meals for your family. However, a messy and disorganized pantry makes it hard to find the ingredients you’ve bought. Food might expire before you have the chance to use it. You may not notice spills that encourage pests to invade. Luckily, with just a little bit of effort and the right supplies, you can get your pantry in tip-top shape.
Step 1: Clear Out Expired Food

Whether you have a well-lit walk-in pantry or a set of cabinets in your kitchen where you store food, it takes a little effort to stay organized. It can be easy to just stack and pile your groceries after a trip to the store, pushing things to the back. The first step in undertaking a pantry project is to take everything out and check for expired food.
Canned goods last a long time, but it’s still important to check the dates. Know the difference between “best by” and “use by” dates. Bagged and boxed foods, especially if they’ve been opened, will expire more quickly. Pests can live under old cans and in the dark corners of your pantry.
Looking over everything can also help you determine future shopping patterns. You’ll know what you eat the most often.
Step 2: Clean Your Shelves
Little liquid spills, a few grains of rice, or a handful of beans can sit on your shelves and invite pantry bugs. Wipe down the shelves, vacuum, and mop the floor, and don’t skip the corners. This may be a good time to install shelf liners to make future cleanup a breeze. If your cleaning reveals pantry pests, make sure you get rid of all contaminated food. Professional exterminators can help identify pests and determine the best way to get rid of them.
Step 3: Create Food Zones
Now that you’ve surveyed the food that’s left, consider how you live your life. Pantry organization isn’t a one-size-fits-all operation. Food zones can help group similar things together but they can also be customized to your lifestyle. Do you pack school lunches every day? Group all those items together. Do you bake regularly? Put your ingredients together on a shelf in arm’s reach. Cook with grains every week? Use wide-mouth jars with big labels rather than open bags precariously balanced on a shelf.
Step 4: Choose Storage Bins and Containers
Though shelves full of matching beautiful baskets can make for a lovely photo, a variety of bins, shelves, and containers work better for items of different sizes and shapes. A lazy Susan, for example, works well for spice jars and vinegar or oil bottles. Large labels help for quick identification of items in bins. Double the height of your shelves with wire racks and don’t forget the backs of doors for hooks. A whiteboard or clipboard can help you keep an inventory for a quick glance before a trip to the store. Nobody wants to find pantry pests, but keeping an organized and clean pantry can help keep them at bay.


