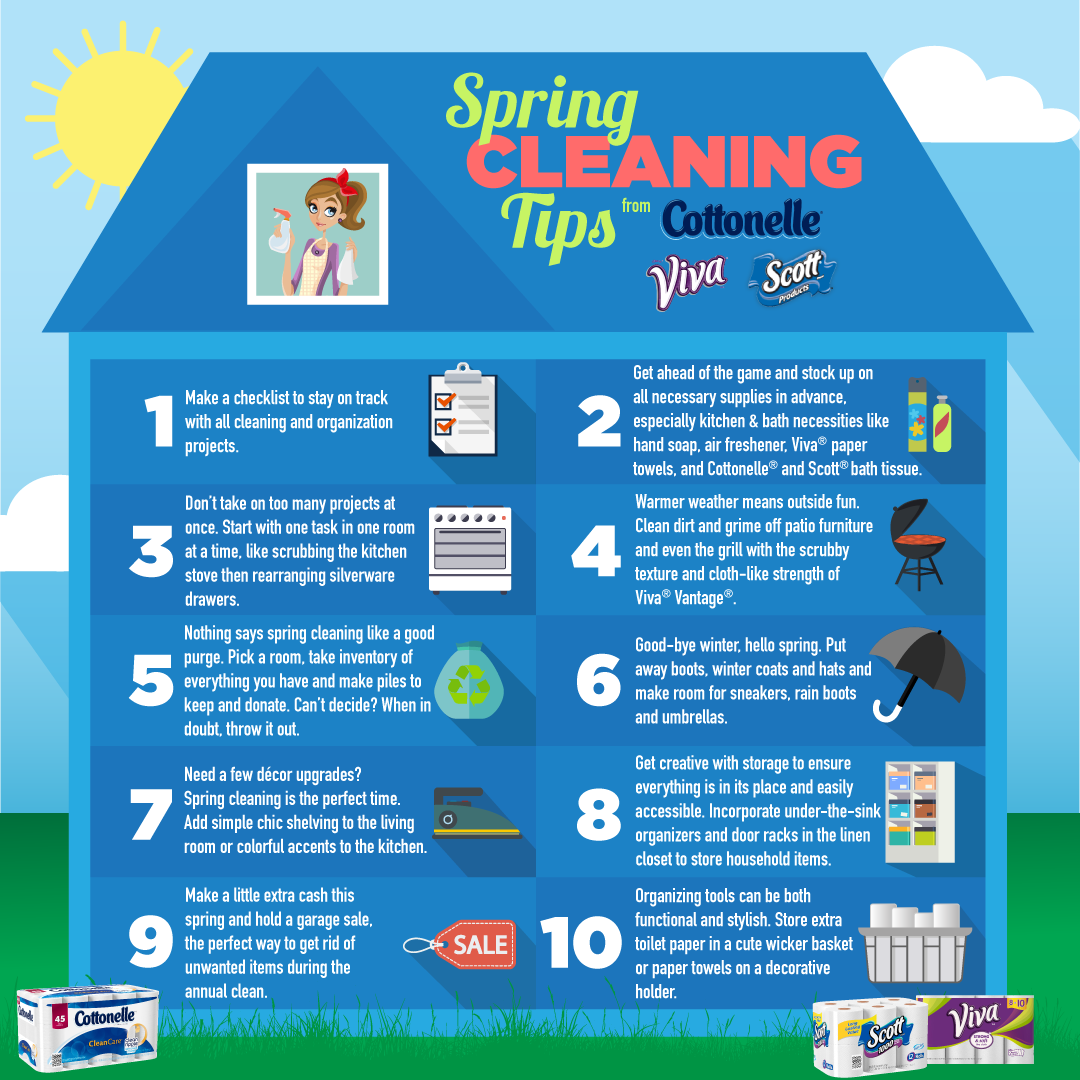
When it comes to spring cleaning many of us dread the thought of it. I’ve learned that the easiest way to tackle it is one room at a time. By tackling one room or even just one project in a room on a given day, the chore seems much more bearable. I like to start in my kitchen and I have some tips for spring cleaning your kitchen that may help you out.
This post has been sponsored by Kimberly-Clark and The Motherhood. I really love any products mentioned and was happy to post about them.
We have an open floor plan in our home so our kitchen is always visible. It is one of the first things you see when you enter our home. So I try to always have it look as neat and tidy as possible. The cabinets are another story, though. My teens are in charge of putting the clean dishes away and the cabinets tend to get out of hand.
Let me preface this post by telling you that due to the stomach flu, I have not yet begun my official spring cleaning. Our entire bunch, all 6 of us, contracted the stomach flu a week ago. All 6 of us. At. The. Same. Time! We spent an entire weekend losing all fluid intake from multiple bodily openings… ahem, if you know what I mean? There was a lot of bum wiping and a lot of disinfecting/cleaning. Toilet paper and paper towels were a God send. We stocked up. We were glad we did. Toilet paper is our friend. 😀 You can actually find really great deal on Viva®, Cottonelle® and Scott® products at your local Walmart. Find more info on those products at the Kimberly-Clark Family Care Walmart site
So this last week, which was supposed to be the start of my spring cleaning, was spent disinfecting every surface in the house.
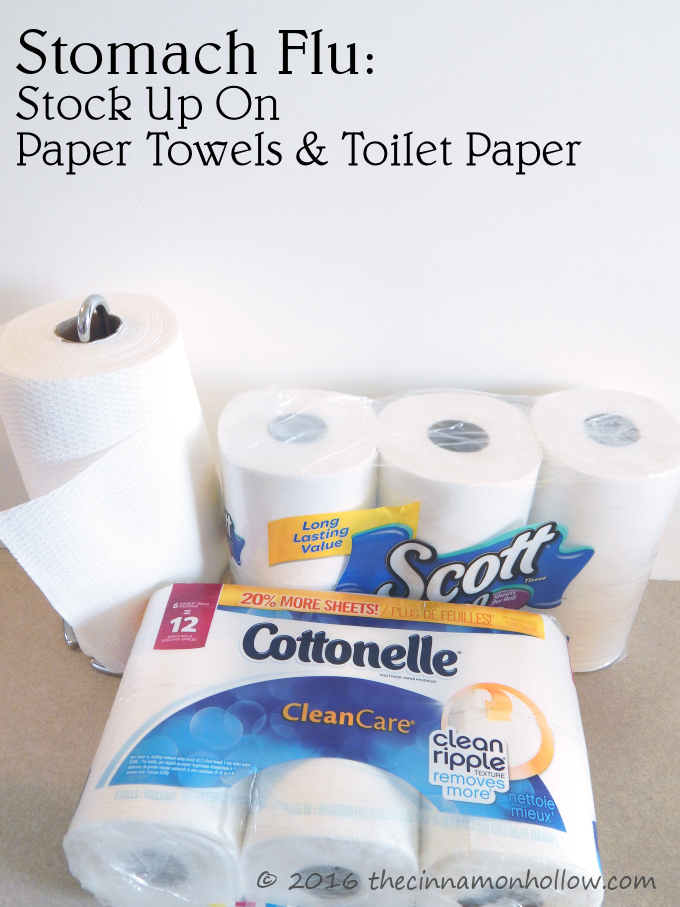
We stocked up on the Cottonelle® Clean Care Toilet Paper Double Rolls with CleanRippletexture and Scott® 1000 Bathroom Tissue. Each bathroom had plenty!
Ok, that’s done, let the spring cleaning begin!
1. Cabinet de-cluttering comes first
For spring cleaning, I like to do the entire kitchen from top to bottom. I start by cleaning out the cabinets and throwing away broken items or containers without lids, etc. I swear those lids run off with missing socks and make a band or something. I have no idea how those things get lost.
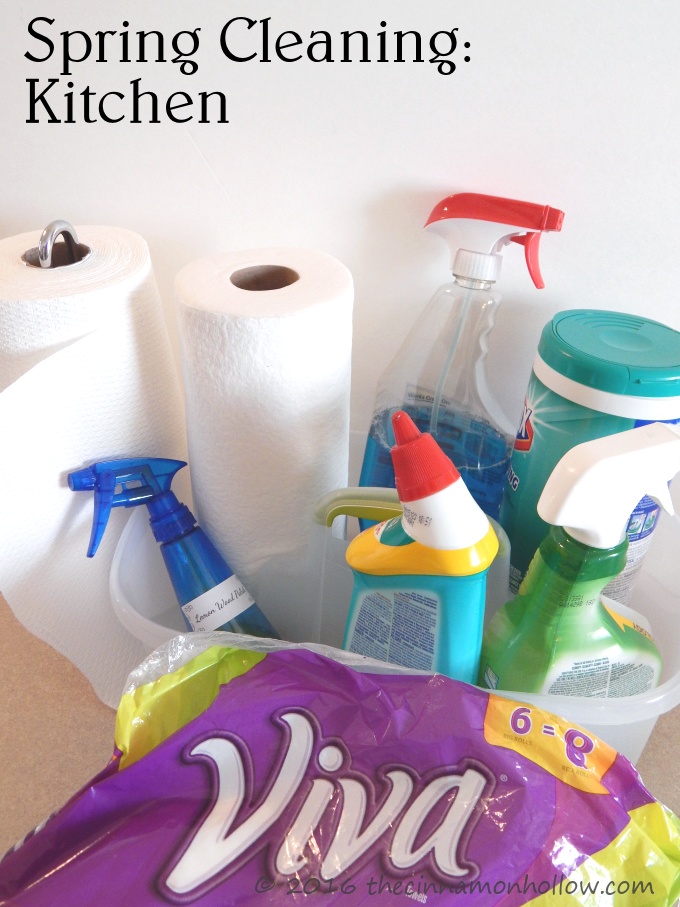
Once I get the clutter out of the way I start cleaning. I use a lot of paper towels when I’m cleaning. I prefer those over a rag because when they are dirty, I can just throw them away and not worry about the germs being transmitted to the laundry area. My favorite brand of paper towels are Viva® Big Roll Paper Towels. There are two varieties that I absolutely love for cleaning. I like the Viva® Vantage® because they are textured like terrycloth and really scrubby without damaging any surfaces. They grease off my stove top as well as toothpaste off the bathroom sink. They really work well in any room. I love the Viva® Towels because they are super soft and really polish up the chrome on our faucets, light fixtures, etc. They feel just like cloth! They are also perfect for hand drying since they are so soft and gentle. Another thing that makes them my absolute favorite is that I can choose the size I want to use so there’s less waste. And one paper towel holds up really well, allowing me to clean more surface area.
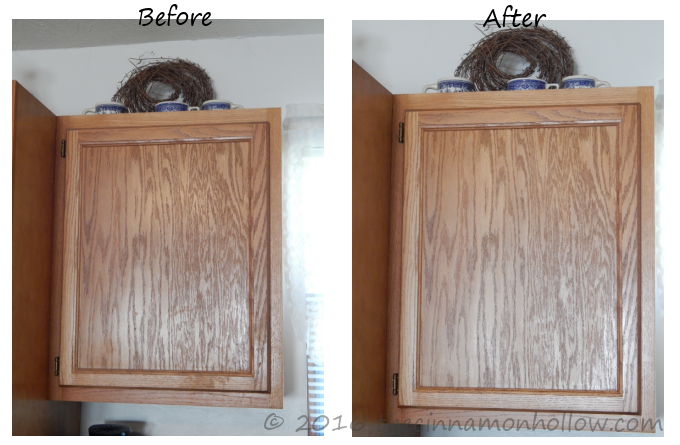
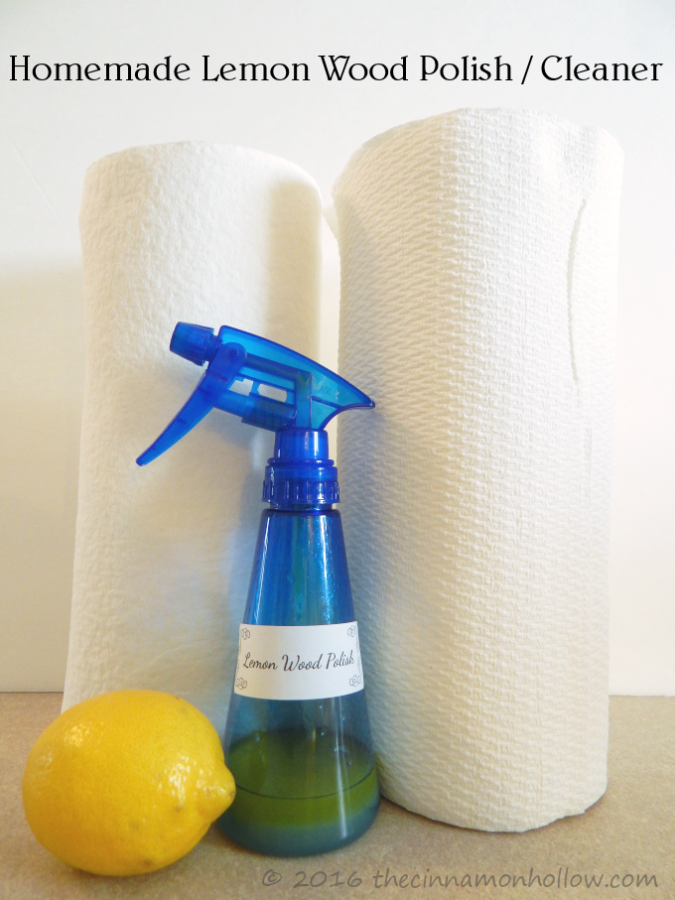
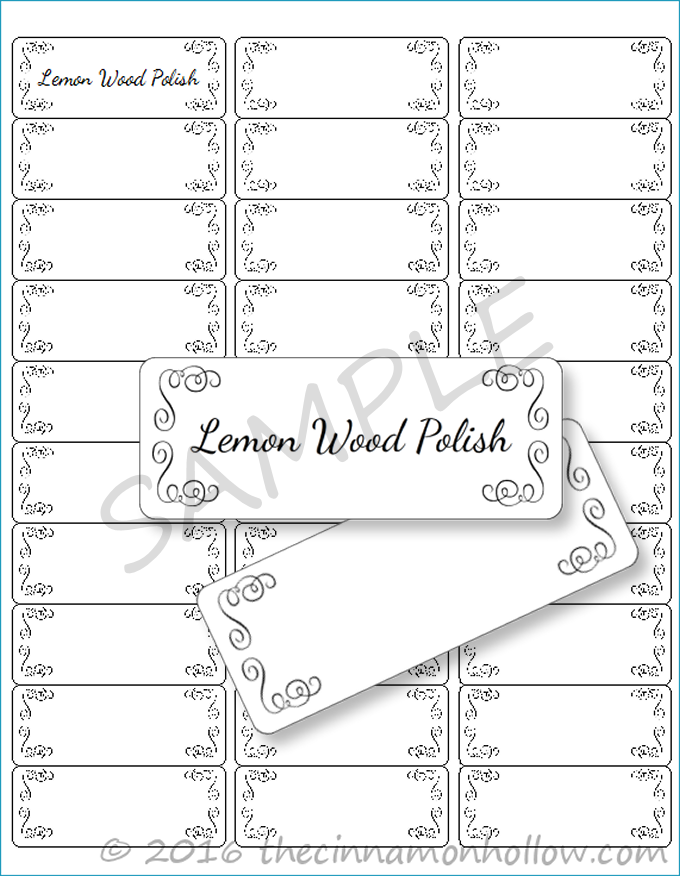
I start with the outer cabinets. I like to give them a good cleaning and then use a homemade lemon polish to make them shine and fresh smelling. I have a recipe, below, for the homemade lemon polish. I also have a label I made as well as some blanks if you’d like to print them out. Shining up the cabinets really makes them pop and look fresh and new. I have a recipe below for the homemade lemon furniture polish I use. This cleaner is natural and shouldn’t harm most woods but please test a small area first and use at your own risk.
I’ve included the label I used as an image as well as a blank label. Those can be opened in your favorite image program or label making program. I’ve also included a file that can be opened in Avery Design Pro using template #1506.
I have several cleaners for different rooms but one thing that stays in my cleaning supply basket is Viva paper towels. I’m obsessed with those things!
2. Windows: windows, curtains and blinds
Then I move on to the windows. I take the curtains and blinds off to clean. While the curtain is washing and drying I soak the mini blind in a tub of dish washing liquid to dissolve away any grease that may have built up. Even thought I dust it each week, being in a kitchen means that grease can collect quickly and make it harder to clean. Then I wipe it down really well. After soaking for about 15 minutes I put it on the deck to dry. I clean the windows inside and out with window cleaner and paper towels. If you like to only use natural cleaners you can use white vinegar but I’ve found where we live, a commercial cleaner works best to really get the glass clean.
3. Appliances
After the windows are done I move on to my appliances. I clean the microwave, refrigerator, stove and dishwasher. I’m lazy and hate cleaning my oven so I use the built-in self cleaner setting. I am so glad I have that! It saves so much time. It takes a couple of hours and makes the kitchen pretty hot so I do that one last. Once it’s done and has cooled off I can just vacuum out the ash and wipe the inside down with a paper towel.
The refrigerator is pretty easy to clean. Toss out any leftovers and condiments that may be a little past their prime. It’s spring cleaning so you want to start fresh! Take out the shelves and drawers and give them a good washing. I’ve never used shelf liner in my refrigerator before but I decided to do so this year. I think it will make it much easier to clean up any spills, like the infamous pickle juice that keeps finding its way out of the jar. Weird!
4. Counter tops and sinks
Ok, once I’m done with all that, I scrub my counter tops and sinks and get rid of, re-home or store any cooking utensils or other items I no longer want sitting out. It’s about de-cluttering for me as much as it is cleaning. We get lazy in the winter time and things don’t always get put back where they go. I want to change that in the spring and have a fresh, cleared, clean space.
5. Floors
Lastly I do the floors. I sweep them really and then give them a good mopping. I also like to apply some polish to the floors to give them some shine back after having snow and mud tracked in all winter. Mopping each week cleans them but these floors are old so they get dull. That little bit of polishing really makes them look great!
That sounds like a lot to do for one room but when you break it down it really isn’t. And you can break it down into a couple of days if that makes it easier. Do the top half of the kitchen, the cabinets and windows, on the first day, the appliances on the second and the counters, sinks and floors on the last. Super easy!
Kitchen Spring Cleaning Breakdown:
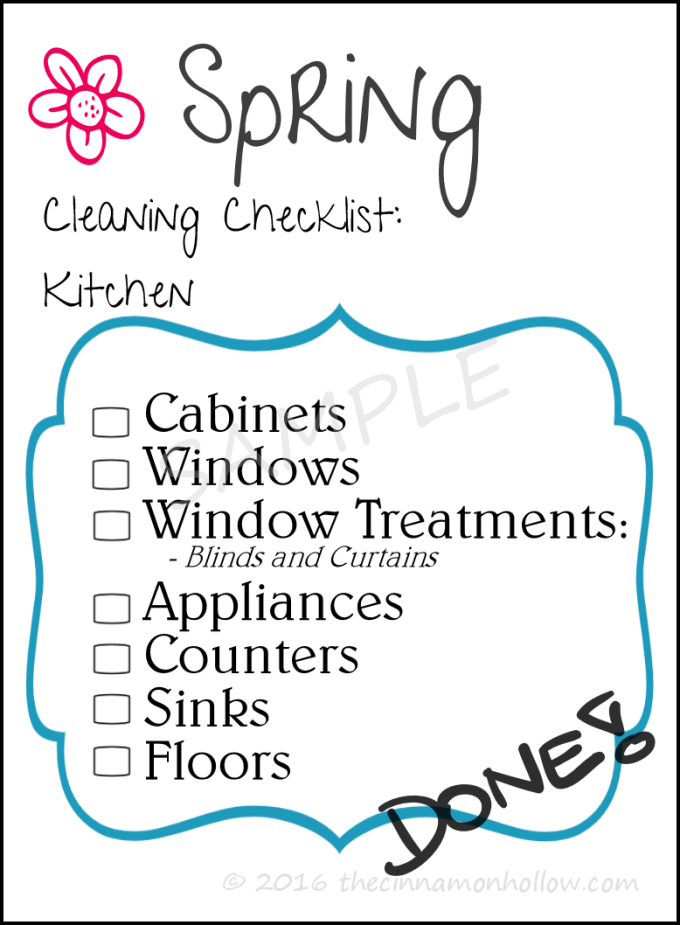
Download the Kitchen Spring Cleaning Checklist, shown above, by clicking the download button below.
- Cabinets
- Windows
- Window Treatments: Blinds and Curtains
- Appliances
- Counters
- Sinks
- Floors
See? It’s not that bad. Then you can move on to another room in your house. I like to move on to closets next. De-cluttering first makes it so much easier to clean. There’s not reason to clean something you’re going to throw away so get rid of it first!
If you’d like to try my homemade furniture polish recipe here you go! Many call for quite a bit of oil as the main ingredients but I find that makes the wood greasy and can be hard to rub in. So I use a little olive oil, lemon juice for fragrance and as a de-greaser and a little vinegar.
Homemade Lemon Wood Polish / Cleaner

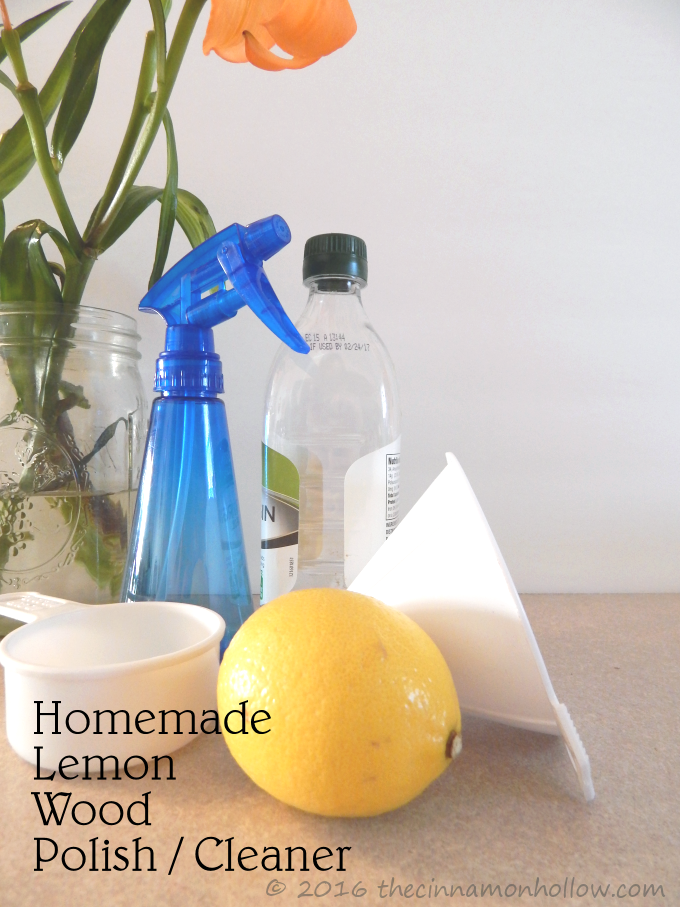
Ingredients
- 1/4 Cup Olive Oil
- 1/2 Cup Lemon Juice
- Spray Bottle
- Funnel (optional)
Instructions
- Pour all ingredients into a spray bottle using a funnel if needed.
- Shake until all ingredients are well mixed. (shake each time used)
- Spritz small amount onto paper towel or dry cleaning cloth.
- Rub into wood, going with grain.
- Let sit 5 – 10 minutes and rub with clean, SOFT, dry cloth to shine. We prefer Viva® Paper Towels for polishing.
Nutrition
Follow Kimberly-Clark products on social media:
Viva: Facebook Twitter Pinterest
Cottonelle: Facebook Twitter Pinterest Instagram
Scott: Facebook Twitter Pinterest
Follow Crystal Martin – Cinnamon Hollow Reviews’s board Spring Cleaning Tips on Pinterest.

Leave me a comment with your best spring cleaning tips!
Travel Lover | Pet Mama | Beauty Junkie | Low Glycemic – Healthy Fats – Low Carb – Keto Inspired Food Enthusiast | Cocktails | Printables
I am a stay-at-home- mom, living in KY with my husband and children. I’m a travel and lifestyle blogger encouraging folks to live their life one adventure at a time while also focusing on beauty, essential oils and health. From time to time I also like to showcase my adorable pets along with my family. Along with Cinnamon Hollow I can be found at The Martin Family Adventure … read more